
I get often questions about drawing realistic faces. Usually I’ll advice to start practicing small details of the face, like the nose, eyes and mouth. Drawing hair can also be seen as an individual subject (for more tips and tricks regarding hair click here). However, in this post we are going one step further. We will discuss drawing of the entire face as a whole. I will start sharing some advice on how to estimate the proportions, and at the end I will tell you my personal tips regarding how to build up a portrait.
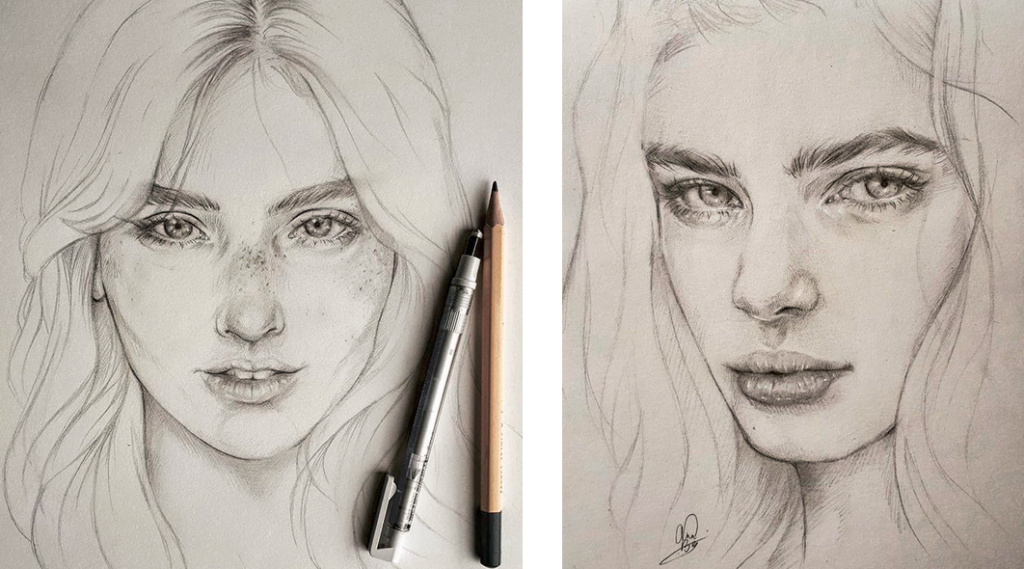
Even though every single face is unique, meaning the proportions will be different for everybody, we can still follow general guidelines. Based on a drawing of mine we will go through all of the tips.
- The eyes are positioned in the middle of the face
The first tip is quite simple, the position of the eyes divide your face in half. They are centered between the chin and the crown.You might not have noticed it before due to the complexity of the face, but you will never forget again!

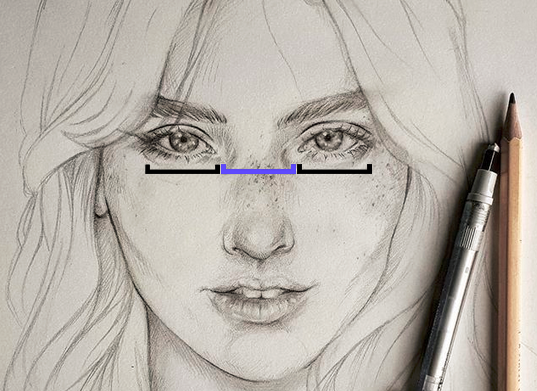
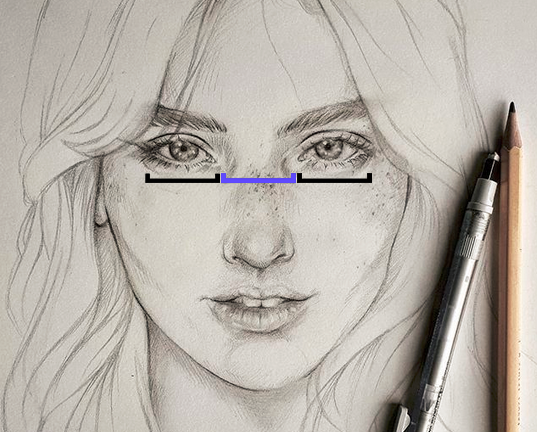
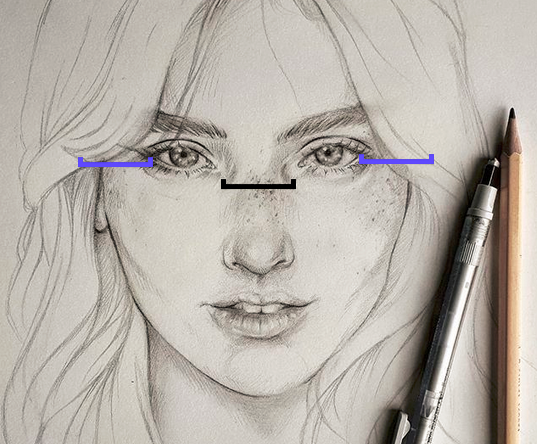
- The distance between the eyes is one eye width
The whitespace between the eyes is usually the width as one eye. You can easily measure that, or of course just estimate it.
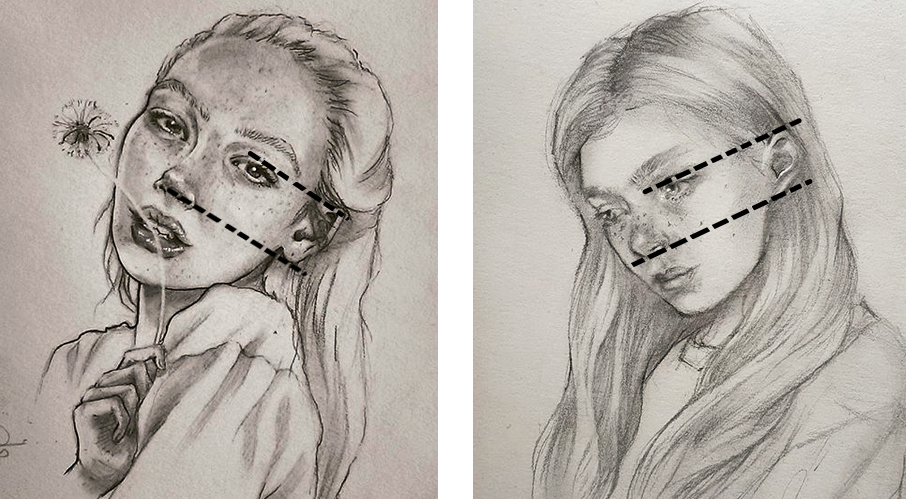
- The nostrils are in line with the tear ducts
You can draw imaginary lines from the tear ducts to the nostrils. This is measurement for the size that the nose should be. If you want to draw a person with a wider or a narrower nose, you can you use the guideline for symmetry.
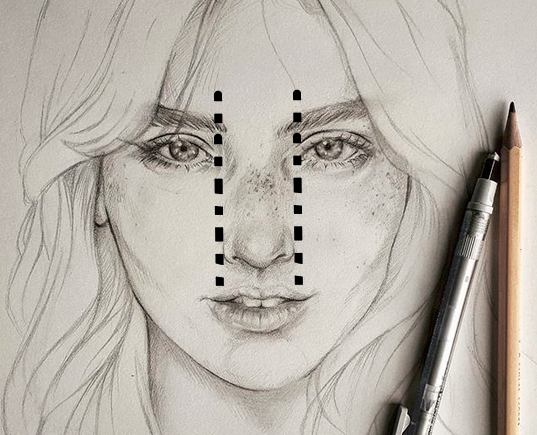
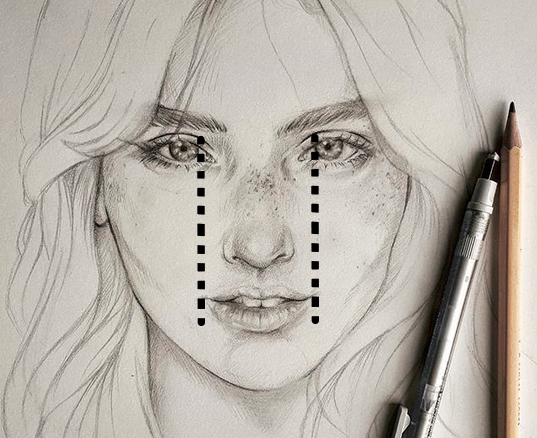
- The corners of the mouth are in line with the iris
Again, as a guideline you can use vertical lines from the corners of the mouth to the iris. Actually you can use the entire iris as a rule of dumb, the mouth has to end somewhere within the iris. Obviously this rule cannot be applied if the person is not looking straight. In that case you’ll have to estimate as if that person was looking straight forward.
- Determining the space between the eyes and the width of the face
Use the distance between the eyes to estimate the width of the face. This should be the same as the distance between the corners of the eyes and the side of the head. This tip might be more difficult to notice, because usually the hair is front of the face and it has more volume the head itself.
- The ears are positioned between the upper eyelid and the bottom of the nose
This might vary the most from all that we have mentioned before. However, this works very well when you are free handing a portrait.
Of course these are just general guidelines. When you follow them, you might draw a perfectly proportioned face, which in real life is usually not the case. With these tips you can easily adjust certain attributes of the face to make them more unique. For example you can add more space between the eyes, or make the mouth bigger or smaller. If you are drawing someone by looking at them, keep these guideline at the back of your head, and just compare them to the real model.
Easy portrait drawing order
The final tip is more of a personal preference. I will describe how I build up a face, and how the tips above are used. There is no wrong order in doing this, it is just how I like to do it.
I usually start sketching the eyes, not just because they are secretly my favourite feature to draw, but also because they are positioned centrally and that makes is easier to build up from there (use tip 1).
Afterwards, I’ll draw the nose. First I have to determine the length of the nose, the width is estimates using tip 2. Keep in mind that when you finish the face, the end of the nose should approximately half-way between the eyes and chin. After sketching the nose I’ll continue with the mouth. As the eyes are already there, you can start using tip 3. Next, I will sketch the chin and will estimate the width of the head (tip 4). Afterwards I will outline the rest of the face, and finish with sketching the ears and hair.
Once I have completed the sketch, I will start further developing the face. Meaning from this point I will start adding details and shadows.
So despite the fact that every single face is unique, there are guidelines that can help you create a realistic portrait. Hopefully these tips will help you sketch a face better. I would love to read your comments and hear about your experiences! 🙂
Love, Annelies.
Do you want to read more about learning and understanding how to draw face portraits? Click here to read my previous blog post.
5 comments
Dawn Osborne
12 April 2019 at 04:15Very helpful and so kind of you. Thank you !! Very much!!
Kito
17 May 2019 at 19:31Hey, Wat een super interessant artikel. Erg leuk om te lezen. Ik heb er veel van geleerd!
Annelies Bes
20 May 2019 at 13:05Wat leuk om te horen! Dankje! 🙂
Luna Kampling
18 May 2020 at 10:11This is mega useful, thank you :3
sumita
11 September 2020 at 15:58nice discribtion…..i like it….